How to Use JupyterLab to Submit Jobs to the Open Science Grid with SLATE
Note: This blog post was first published on Oct 20,2020 and last updated on Apr 04, 2023.
Our previous post JupyterLab and HTCondor with SLATE described deployment of an HTCondor pool onto a SLATE-registered Kubernetes cluster with job submission provided by a JupyterLab application. But what if you want just a JupyterLab capable of submitting jobs to the Open Science Grid?
Assumptions
We assume you have a SLATE account and access to a Kubernetes cluster registered with the SLATE federation. You will also need a local copy of the SLATE client installed. See SLATE quickstart or contact us if you need help getting started.
We also assume that you have an authentication(submit) token and a project name in OSG that allow you to submit jobs to OSG’s open science pool. If you’d like to use this app to submit jobs to a different pool, you should be able to do so with minor changes to the commands and configurations used in this blog post.
Note: this post is a technical preview of things to come, and primarily intended for demonstration purposes.
Create a Secret
- Copy the submit token and paste it into a file named
submit-token. Then, create a secret using the below SLATE command as show below (where <your-group> in the command is the SLATE group you want to use, and <a-cluster> is the name of the target cluster you want to use for your deployment):
  $ slate secret create submit-auth-token --group <your-group> --cluster <a-cluster> --from-file condor_token=submit-token
  Successfully created secret submit-auth-token with ID secret_dHiGnjAgR2A
Deploy JupyterLab
Download the base configuration of the JupyterLab application:
$ slate app get-conf jupyterlab > jupyter.conf
Generate a random token for your JupyterLab instance:
$ openssl rand -base64 32
mO6KJvhomZ733r/UUW6i1VXuuWgXV/gVN3VrXOgNwEg=
Edit the JupyterLab application configuration file, in this case jupyter.conf, so that it has an Instance name and NB_USER of your choice, and a Token set to the token you just generated in the previous command. In our example, those values are:
Instance: 'blogpostjupyter'
Jupyter:
  NB_USER: 'demo_user'
  Token: 'mO6KJvhomZ733r/UUW6i1VXuuWgXV/gVN3VrXOgNwEg='
Choose a subdomain for the ingress (This will be used in the application’s URL):
Ingress:
  Subdomain: 'blogpostnotebook'
Update the CondorConfig to be enabled, and use hostname flock.opensciencegrid.org as the CollectorHost, port 9618 as the CollectorPort, a port number between 30000-32767 as the ExternalCondorPort, the value true for the IsExternalPool variable, and the submit secret, in our example “submit-auth-token”, as the AuthTokenSecret. In our example, the configuration will be:
CondorConfig:
  Enabled: true
  CollectorHost: flock.opensciencegrid.org
  CollectorPort: 9618
  ExternalCondorPort: 32676
  IsExternalPool: true
  AuthTokenSecret: submit-auth-token
The last change is for the SSH service. Enable the service and add the SSH public key you want to use to SSH into the JupyterLab instance:
SSH:
  Enabled: true
  SSH_Public_Key: 'ssh-rsa AAAAB3NzaC1yc2......i0pRTQgD5h1l+UvL/udO+IUYvvi slate'
Considering the number of jobs submitted in this demo, and local processes created by condor to handle that, we recommend increasing the resource limit in the config file as follows:
Resources:
  # The maximum amount of CPU resources the notebook should be able to use
  # in units of thousandths of a CPU core, e.g. 1000 == 1 CPU core.
  CPU: 2000
  # The maximum amount of memory the notebook should be able to use,
      # in megabytes.
  # Note that jupyter and other built-in components use some memory,
  # so somewhat less than the value specified here will be available
  # to user code.
  Memory: 4096
You’re now ready to install the JupyterLab application on SLATE:
$ slate app install jupyterlab --group <your-group> --cluster <a-cluster> --conf jupyter.conf
Note: If deployment fails due to an instance name that’s already been chosen by another user or due to an ExternalCondorPort value that’s already allocated, please choose a different value for the instance and\or port and try running the above command again.
Inspect the instance’s info to see the allocated URL and address for SSH service:
$ slate instance info <instance-ID>
Services:
Name                        Cluster IP    External IP   Ports          URL
your-group-jupyterlab 10.96.150.245 <IP-address>  8888:30712/TCP http://blogpostnotebook.slate-dev.slateci.net/
your-group-jupyterlab 10.96.150.245 <IP-address>  22:30033/TCP   <ip-address>:<port-number>
In the above example, the JupyterLab application can be accessed at this address blogpostnotebook.slate-dev.slateci.net using the Jupyter token you generated above. The second line has the SSH access info under URL, so you can use it with the ssh command like this:
ssh -p <port-number> <username>@<ip-address>
where <username> is what you chose above for the NB_USER configuration variable.
Job Submission to the OSG
We can submit jobs with either a JupyterLab terminal (using the Unix command line) or from a Jupyter notebook. We’ll use an OSG Connect Quickstart tutorial example with a few modifications.
From a JupyterLab Terminal
First, open a new terminal window in your JupyterLab and create a test script to be executed as your job:
$ nano short_transfer.sh
Copy the below code into it and save the file:
#!/bin/bash
printf "Start time: "; /bin/date
printf "Job is running on node: "; /bin/hostname
printf "Job running as user: "; /usr/bin/id
printf "Job is running in directory: "; /bin/pwd
printf "The command line argument is: "; echo $1
printf "Contents of $1 is "; cat $1
cat $1 > output.txt
printf "Working hard..."
ls -l $PWD
sleep 1
echo "Science complete!"
The above script takes an input file as an argument so we need to create one. A quick way to do that is:
$ echo "Hello World from SLATE" > input.txt
Then, create a log directory:
$ mkdir log
Create a condor submit file job.sub:
$ nano job.sub
Copy the below into the submit file and save. (If you already have an OSG project, replace the SLATECI =+ProjectName= string with the name of your project):
executable = short_transfer.sh
arguments = input.txt
transfer_input_files = input.txt
transfer_output_files = output.txt

error = log/job.$(Cluster).$(Process).error
output = log/job.$(Cluster).$(Process).output
log = log/job.$(Cluster).$(Process).log

request_cpus = 1
request_memory = 1 MB
request_disk = 1 MB
+ProjectName = "SLATECI"
# Let's queue a 1000 jobs with the above specifications
queue 1000
and submit the job using the condor_submit command:
$ condor_submit job.sub
Submitting job(s).
1000 job(s) submitted to cluster 15.
In our experience with this job submission to OSG, it took around one hour for all the jobs to finish. A successful run will create in your local directory the file output.txt with the “Hello World from SLATE” message in it. Additionally, you should see inside the log directory all the output, error and log files for the individual jobs.
To check the status of your jobs, you can use the condor_q command as shown in the Checking Job Status section below.
From a Jupyter Notebook
If you prefer to use a notebook to submit your jobs to the pool, you can do that using HTCondor Python Bindings as follows:
Create the
short_transfer.shandinput.txtfiles and thelogdirectory, as shown above. Then, open a new Python notebook, and import the below two modules:
Create a
Submitobject for your job as shown below under sourcecode and snapshot (For those who have their own OSG project name, please substitute theSLATECIbelow with the name of your project):
Sourcecode:
short_transfer_job = htcondor.Submit({
"executable": "short_transfer.sh",  # The program to run on the execute node
"arguments": "input.txt",
"transfer_input_files": "input.txt",
"transfer_output_files": "output.txt",
"error": "log/job.$(Cluster).$(Process).error",     # Anything the job prints to standard error will end up in this file
"output": "log/job.$(Cluster).$(Process).output",   # Anything the job prints to standard output will end up in this file
"log": "log/job.$(Cluster).$(Process).log",         # This file will contain a record of what happened to the job
"request_cpus": "1",          # How many CPU cores we want
"request_memory": "1MB",      # How much memory we want
"request_disk": "1MB",        # How much disk space we want
"+ProjectName": classad.quote("SLATECI"),
})
print(short_transfer_job)
Snapshot: 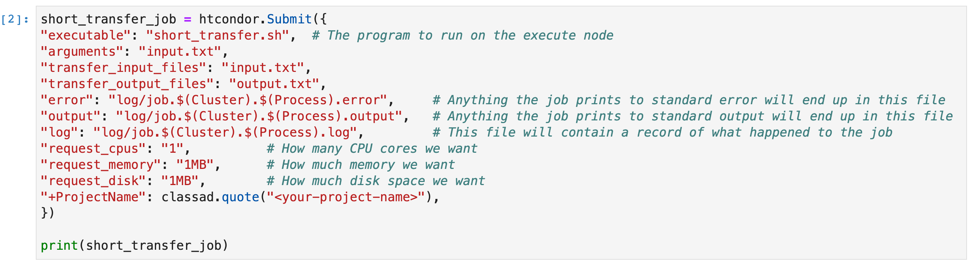
The last command prints the job so that you can verify that it has right specifications you want.
- The last step is to queue your job like this:
Sourcecode:
schedd = htcondor.Schedd()          # get the Python representation of the scheduler
with schedd.transaction() as txn:   # open a transaction, represented by `txn`
	cluster_id = short_transfer_job.queue(txn,1000)     # queues 1000 job in the current transaction;
	print(cluster_id)
Snapshot: 
Checking Job Status
The time it would take for your jobs to finish depends on resource availability within the pool and the processing time your jobs need. To check the status of your job submission, you can run the command condor_q from the terminal to see your jobs that are pending, running or done, as you can see in the below output example. The command might take a moment before it prints the output, especially when submitting a large number of jobs.
OWNER  	BATCH_NAME    SUBMITTED   DONE   RUN    IDLE  TOTAL JOB_IDS
demo_user ID: 4        9/18 02:43    825     14    161   1000 4.132-952

Total for query: 175 jobs; 0 completed, 0 removed, 161 idle, 14 running, 0 held, 0 suspended
Total for demo_user: 175 jobs; 0 completed, 0 removed, 161 idle, 14 running, 0 held, 0 suspended
Total for all users: 175 jobs; 0 completed, 0 removed, 161 idle, 14 running, 0 held, 0 suspended
Uninstall
If you need to uninstall an application you previously deployed on SLATE, run the below commands:
$ slate instance delete <instance-ID>
$ slate secret delete <secret-ID>
Summary
We deployed a JupyterLab application on a Kubernetes cluster registered with the SLATE platform. After getting the proper approval and authorization token, the deployed app can be used to submit jobs to the opportunistic pool of the Open Science Grid in either conventional ways (via a terminal command line) or from a notebook.
Questions?
As always, we encourage you to try this out and let us know what’s working, what’s not, what can be improved and so on. For discussion, news and troubleshooting, the SLATE Slack workspace is the best place to reach us!